Step 1: Charge and Power On the Reader
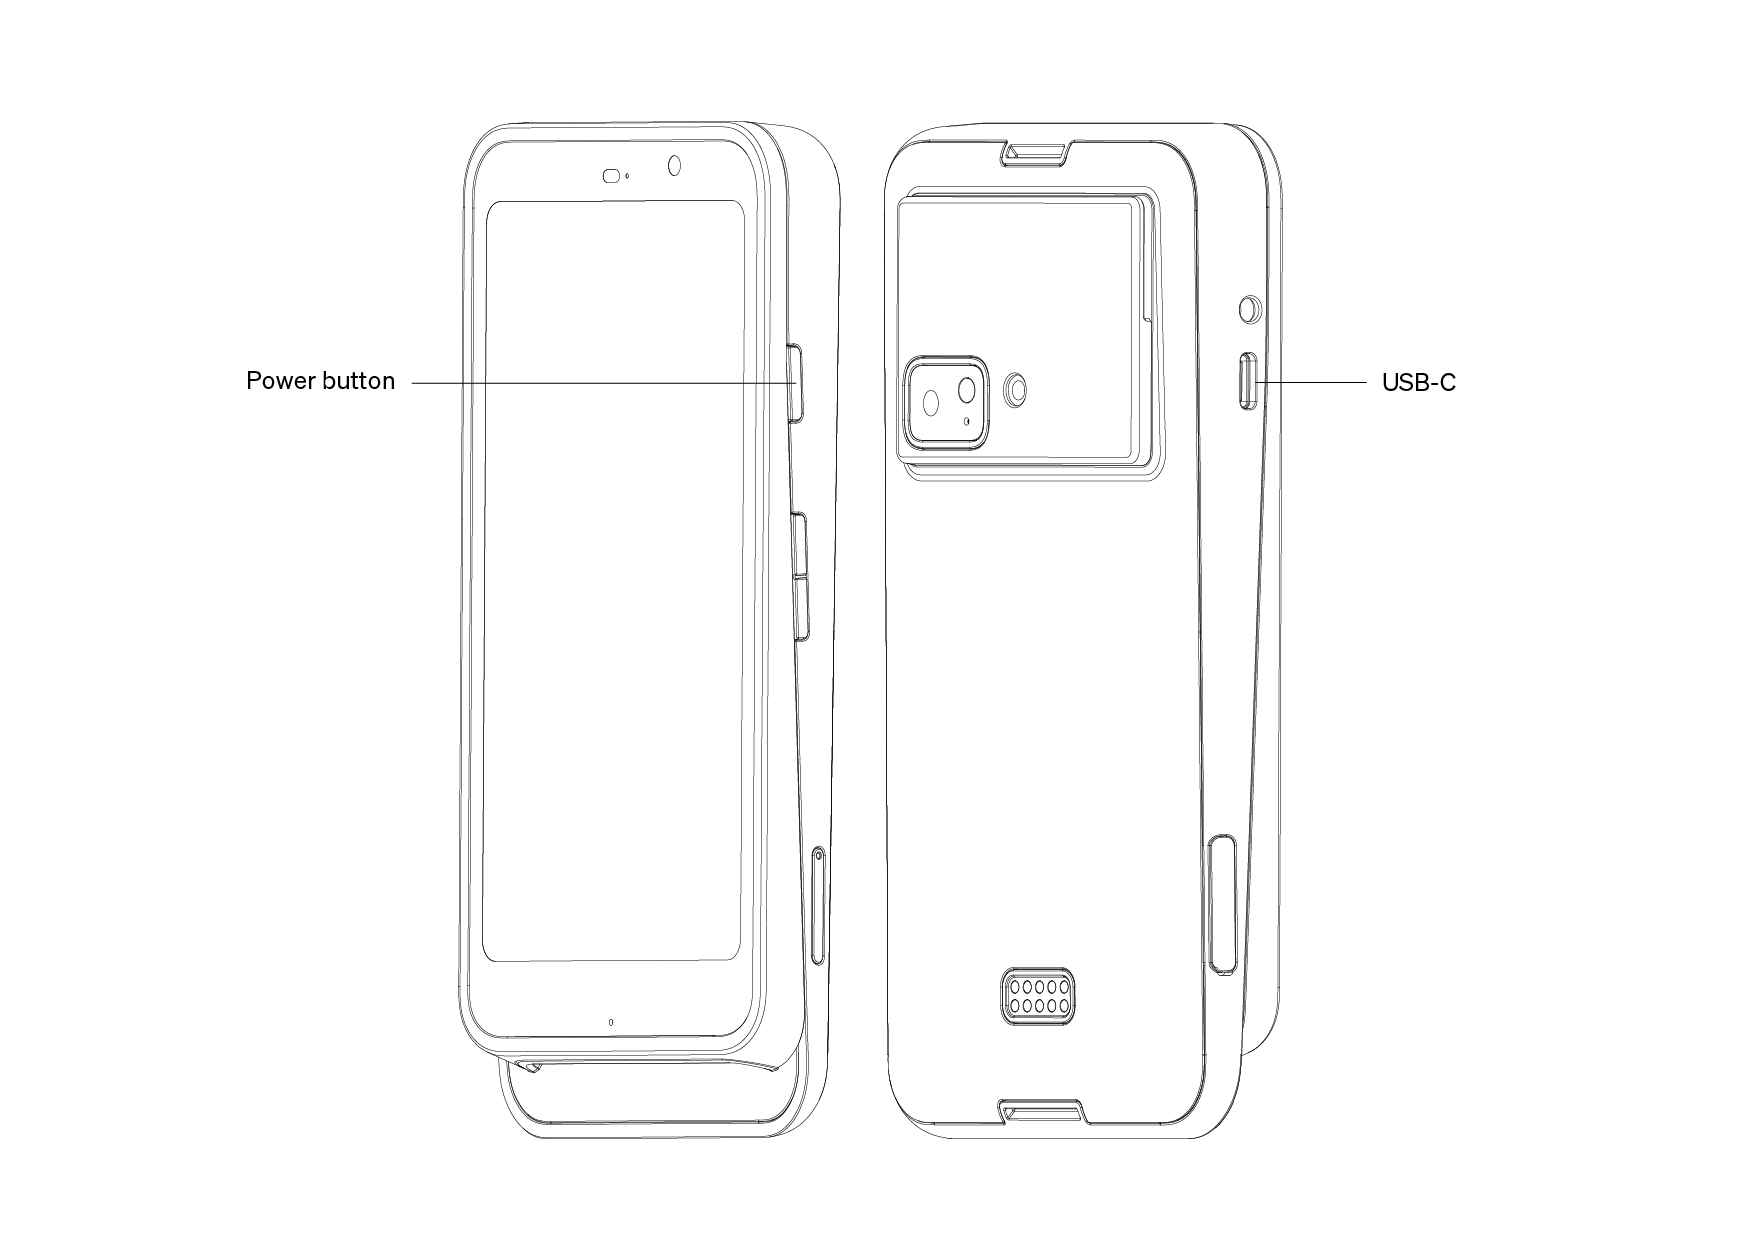
- Plug the provided USB-C cable into the port on the left side of the reader.
- Connect the other end of the cable to the provided power adapter and plug it into a power outlet.
- Once the reader is fully charged, hold down the power button on the right side until the screen turns on.
- Wait for the reader to finish booting up, then select your preferred language.
 Step 2: Connect the Reader to Wi-Fi
- Select the Wi-Fi network you'd like to connect to.
- Enter your password. To double-check what you typed, tap the eye icon to the right of the password field.
- Tap Continue.
Step 3: Change Networks (If Needed)
If you connected to the wrong network or want to switch to a different one, you can do so from the reader's settings menu:
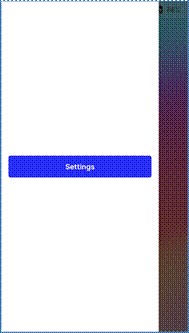
- Swipe right from the left edge of the reader screen.
- Tap Settings.
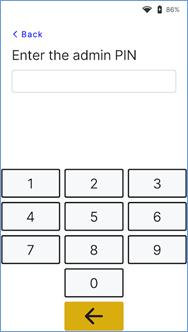
- Enter the admin passcode 07139.
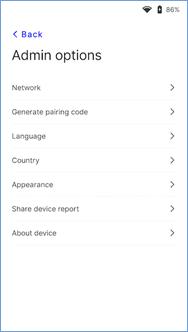
- Tap Network in the Admin Options list and select the new network.
Step 4: Write Down Your Pairing Code
Once the reader has finished installing updates and is connected to Wi-Fi, click on Generate Pairing Code it will display a pairing code made up of three or more words separated by dashes (for example, word-word-word).
Write the code down or take a picture of it. You'll need it in Step 6 to add the reader to Droptop.
Step 5: Open Stripe Payments in Droptop
- Open the Droptop app on a device connected to the same Wi-Fi network as the reader.
- Sign in with a user account that has permission to make this change.
- From the main navigation pane on the left, go to Account Settings.
- Under the Operations tab, click Settings for the operation where you'll be using the reader.
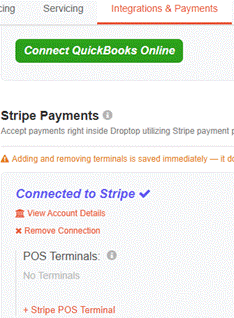
- Go to the Integrations & Payments section and scroll down to Stripe Payments.
- Click the + POS Terminal button.
Or contact our support team to enable the Stripe integration for your account via live chat or email: support@droptop.io
Step 6: Register the Reader
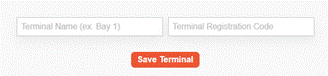
- In the Terminal Name field, enter a name for the reader. This name is displayed throughout the Droptop app. If you'll be using multiple readers, give each one a clear name, such as Bay 1 or Van 1.
- In the Terminal Registration Code field, enter the pairing code from Step 4, including the dashes.
- Click Save Terminal.
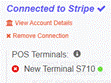
The reader will display a connecting message. Once pairing is successful, the Stripe logo will appear on the reader, and it will be listed under POS Terminals in Droptop.
Step 7: Take a Payment
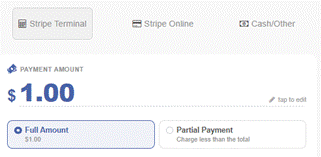
You're all set to accept payments with your new reader. Click the + Payment button on any order to open the reader module, then follow the prompts to take an in-person payment. If you have multiple readers, you can switch between them from this same module.
Troubleshooting Connection Issues
If the reader won't connect or payments aren't going through, try the following:
- Match connection types. Make sure the reader and the device running Droptop connect to the network the same way (for example, both on Wi-Fi). If the Droptop device uses an ethernet cable while the reader is on Wi-Fi, this can cause connection issues.
- Check your router's firewall. If a firewall is enabled, make sure the correct ports are open (see the Stripe documentation linked below). If you're not familiar with your router setup, contact your Internet Service Provider for help.
- Check your device's firewall. Make sure any firewalls on the device running Droptop are turned off or have the correct ports open.
- Test with a different network. Turn on your smartphone's mobile data (with Wi-Fi off), create a hotspot, and connect both the reader and the Droptop device to it. If payments work on the hotspot, the issue is likely with your Wi-Fi router.
For more help, see Stripe's official troubleshooting guide: https://docs.stripe.com/terminal/readers/stripe-reader-s700-s710#troubleshooting
If you still can't connect after trying the steps above, contact Stripe support: https://support.stripe.com/
Optional: Cellular Connectivity
The Stripe S710 reader supports cellular connectivity through Stripe's partner mobile virtual network operator (MVNO), so you can process payments without a Wi-Fi connection. The reader may switch between cellular networks depending on availability.
The fee is $15 USD per month per terminal. To activate this feature, contact Droptop support at support@droptop.io.
For more information, visit the hardware section of our website: https://www.droptop.io/products/hardware-droptop
Was this article helpful?
That’s Great!
Thank you for your feedback
Sorry! We couldn't be helpful
Thank you for your feedback
Feedback sent
We appreciate your effort and will try to fix the article